

How To Add Subscript In Google Forms
Google Forms is an app with a lot of reasons to recommend it. It'southward simple to use, easy to share, and it's got a clean interface. Chief amid its all-time features is that Google Forms is costless.
Anyone with a Google account can use Google Forms. It's only an excellent tool for creating surveys, quizzes, and virtually any other kind of form you can dream up.

In this article we'll show you how to make a Google Form in just a few simple steps.
1. Brainstorm Creating a Google Form
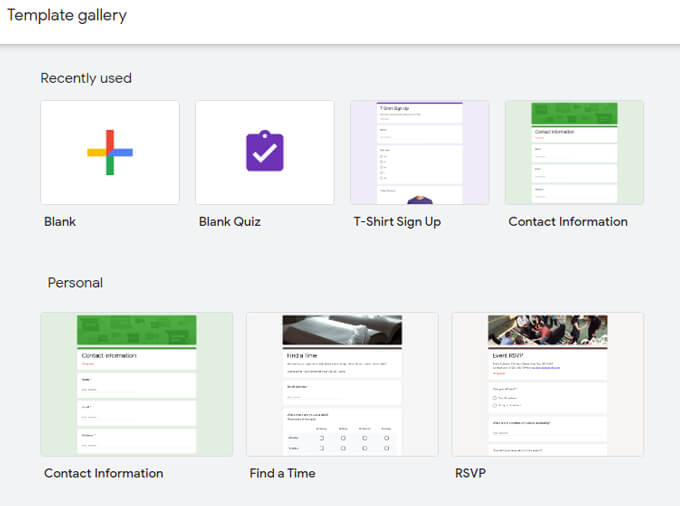
Start, navigate to forms.google.com and login if prompted. At present information technology's time to determine what kind of form you lot want to make. Yous tin choose from among the templates in the template gallery, start a new form from scratch, or indistinguishable a form you've made in the by.
Make a Quiz
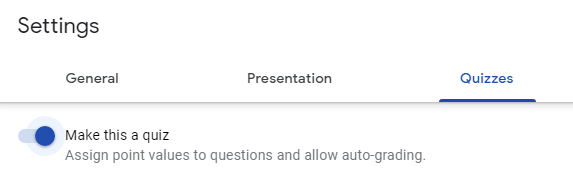
If yous're writing a quiz, you can begin past selecting a quiz template or a Blank Quiz. Alternatively, at any fourth dimension y'all tin choose to make your course a quiz by selecting Settings and then on the Quizzes tab, select the toggle button to Brand this a quiz. Making your form a quiz allows you to assign point values to each question. Google Forms volition automatically grade respondents' answers.
Making your course a quiz likewise opens upwards some other options, similar when to tell the respondent how they performed on the quiz. You can "release" the grade after each question or later, after you've manually reviewed their answers.
You can also choose whether respondents tin can see missed questions, correct questions, and/or point values.

Next, give your course a title and, if you wish, a clarification.
2. Calculation a Question or Element
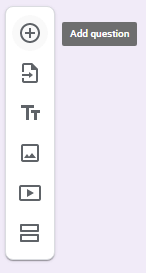
Google Forms are primarily fabricated up of questions, merely at that place are boosted elements you tin add together, too, such as images, videos, and sections.
Importing Questions and Elements
If you've created a Google Form in the past that has questions or elements you want to use in your new course, you tin import them.
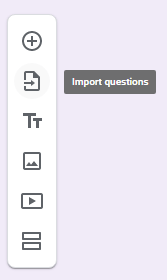
Select the Import icon and and then select the course containing questions you want to import and choose Select. Next, in the Import questions console, check the box next to every question or chemical element y'all want to import. Finally, select the Import questions button.
Question Types
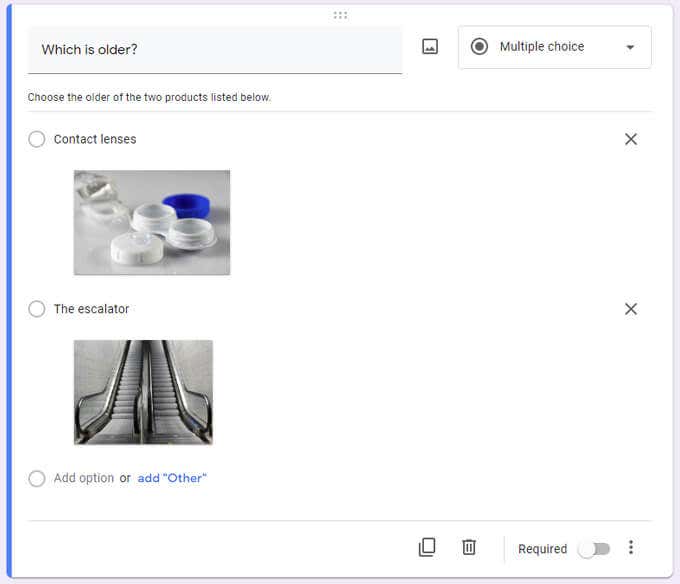
Add a question manually past selecting the Add question icon.
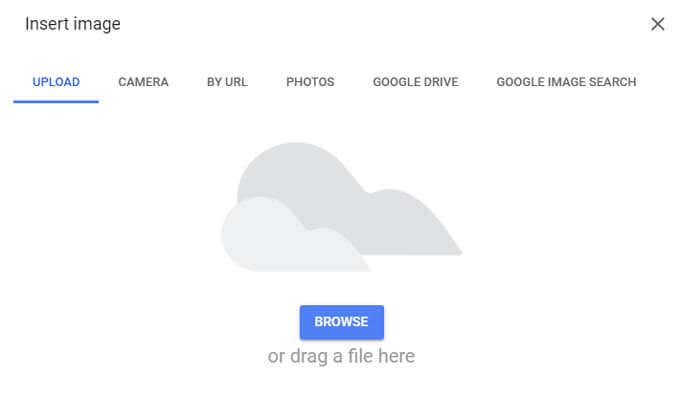
Type the question and, if you want, select the Insert image icon to the right of the question. Images can come up from a variety of sources including your computer, your camera, your Google Photos, your Google Drive, or by doing a Google Image Search.
Next, cull your question type. Google Forms includes all the standard types of questions that yous'll discover in other forms tools like SurveyMonkey or Microsoft Forms.
Question types include:
- Short reply
- Paragraph
- Multiple choice
- Checkboxes
- Dropdown selector
- File upload (Files will be uploaded to the form owner's Google Bulldoze.)
- Linear scale
- Multiple option grid
- Checkbox grid
- Date
- Time
Enter the response options for your question. For any question type, there are options beneath the question and answers where you tin can require a response, add together a description or other actress text beneath the question, add response validation, specify which section the respondent should jump to based on their answer, and/or shuffle the order in which the answer options appear.
3. Pick a Theme
Run into what your form volition await similar to respondents at any point by selecting the Preview icon.

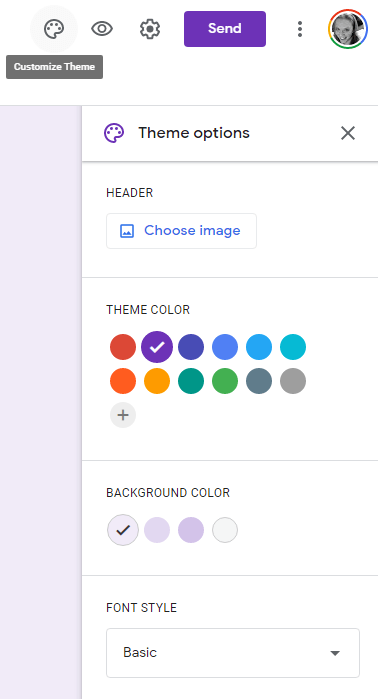
To jazz up the look and feel of your form, select the Theme options icon. There you can choose a header image for your grade also as theme and background colors. You can also cull from amid iv font styles. (Special request: for love of all that is holy, please never, ever cull the "Decorative" font.)
4. Bank check Settings for More Options
Selecting the Settings (gear) icon volition give y'all access to boosted options related to collecting responses, how your grade is presented, and the options for quizzes discussed above.
Settings for Collecting Responses
In the General tab you can choose to collect email addresses from the people who fill up out your form. Moreover, you can prepare the form to e-mail respondents their answers automatically or only if the respondent requests a copy.
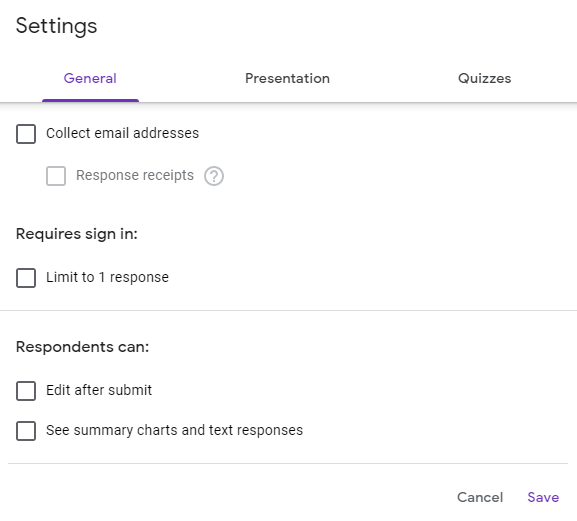
You can also stop people from responding multiple times. In that location are also settings to allow respondents to edit their responses after they submit the form and to allow them to see summary charts and text responses.
Presentation Settings
In the Presentation tab in Settings, you lot tin opt to show respondents a progress bar indicating how much of the course is left for them to complete. If you lot want the social club of the questions to be randomized, cheque the box next to Shuffle question order. And, if you want respondents to be able to fill out the form over again, cheque the box next to Show link to submit some other response.
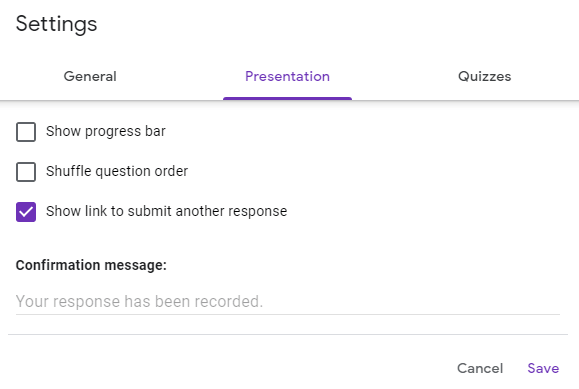
The Presentation tab is also where y'all can write a Confirmation message that will be displayed in one case respondents have completed the course.
5. Share Your Class
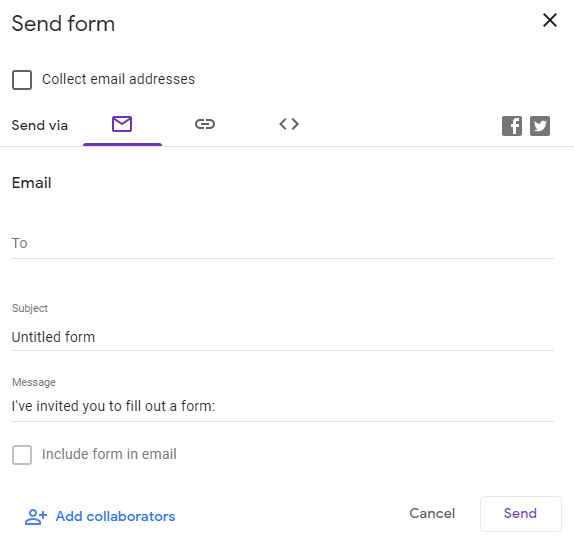
Once your form is ready to become, select the Send push button. You'll see a number of ways to share your form. Check the box marked Collect email addresses if you lot want to keep a record of respondents' electronic mail addresses.

Transport Via Email
To send your course in an email, enter in the recipient's electronic mail accost, the electronic mail subject field, and, if you want, a brusque message. If you want the form to be directly embedded in the e-mail itself, as opposed to an email with a link to the form, bank check the box marked Include class in electronic mail.
If y'all desire to share the form for other editors to edit, select Add together collaborators and add editors by selecting them from the list or entering their email address.
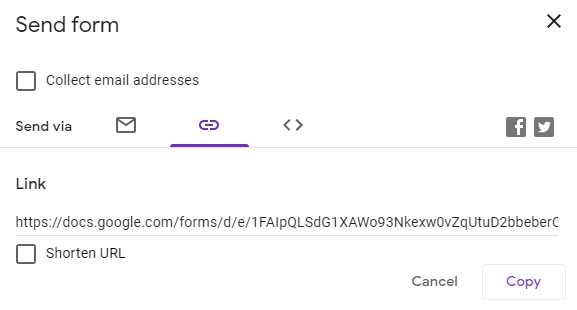
Generate a Link
Selecting Transport via link volition generate a link y'all can copy and paste anywhere you lot want, including in a text message, a messaging app, or chat group.
Share on Social Media
Choosing the Facebook or Twitter icons volition open a new browser tab with a pre-filled typhoon post for the social media network you lot selected.

6. Get Answers
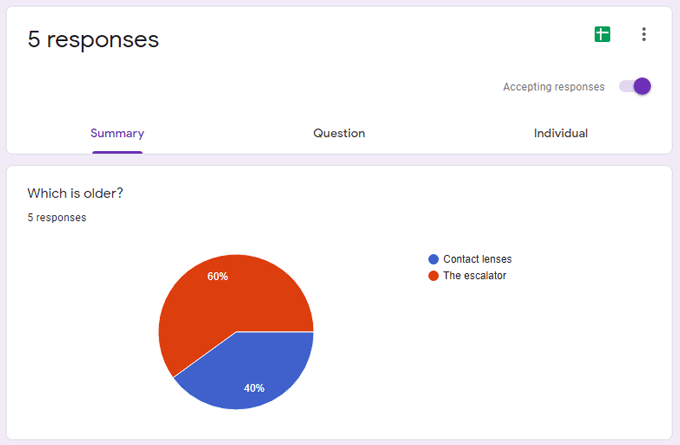
Select the Responses tab, and you'll get access to a quick summary of responses. You can also view individual responses or export responses to a spreadsheet.
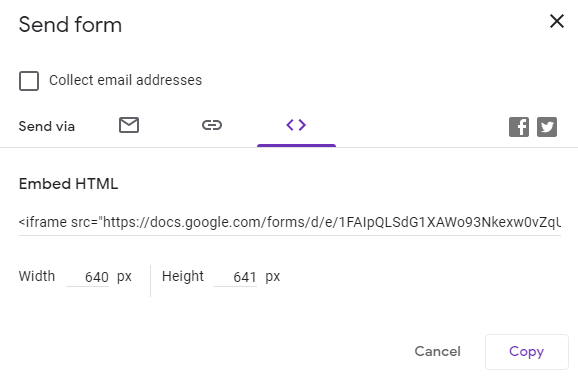
Generate Embed HTML Code
If you want to embed your form onto a web page, choose Transport via Embed HTML. You tin specify the width and pinnacle of the form, and Google Forms will generate HTML code for you to copy and paste into your website.
Add-Ons for Google Forms
At that place are many add-ons available for Google Forms in the Google Workspace Marketplace. These add-ons can extend the functionality of Google Forms in all kinds of ways. Select the More than/Ellipsis icon to the right of the Send push button and choose Add-ons.
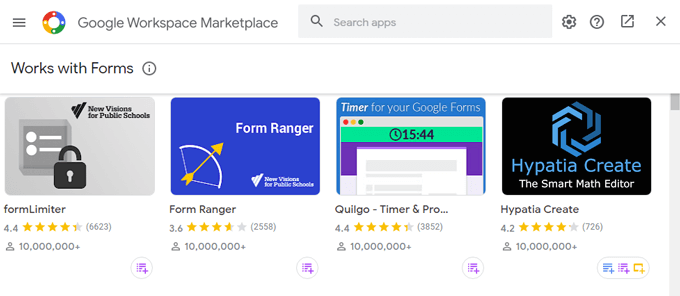
Practice yous want to add a timer to your form, customize email notifications, or generate a word cloud from class responses? There's an addition for that.
Do not share my Personal Information.

How To Add Subscript In Google Forms,
Source: https://www.online-tech-tips.com/google-softwaretips/how-to-make-a-google-form-a-complete-guide/
Posted by: howarddiseve.blogspot.com
0 Response to "How To Add Subscript In Google Forms"
Post a Comment